Organic fertilization and composting in the kitchen garden

Soil maintenance is a crucial step to raising a healthy kitchen garden. Regulate the nutrient level of your soil for better growth of vegetables and herbs. How to know the nutrient level of the soil is an important matter to be discussed.

In this article, we will discuss methods for determining the nutritional level of soil. Additionally, we will explore organic fertilization techniques to enrich the soil naturally. These strategies promote soil sustainability.

Assessment of soil nutrient level

Before making compost for the kitchen garden, it’s very important to know the level of nutrients in the soil. Follow these steps to determine the nutrient level of the soil.

  • Take some samples of your soil and visit the nearby laboratory for complete analysis and testing.
  • If you can’t reach the laboratory, use DIY kits to assess the nutrient level at home.
  • Observe the color of your soil. The dark brown color of the soil indicates a higher amount of organic matter, and vice versa.
  •  Observe the growth of the plant, because they show different symptoms if facing a deficiency of any nutrient.   

Nutrients with their deficiency symptoms

Here is a brief description of the deficiencies of all primary, secondary, and micronutrients in the plants.

1. Primary nutrients

Nutrient Symbol Deficiency Symptom
Nitrogen
N
Yellowing of older leaves, undersized plants results in poor tillering.
Phosphorus
P
Appearance of purple color on the margin of the leaves, stunted root growth
Potassium
K
Scorching and curling of leaf edges, quality of fruit.

3. Micronutrients

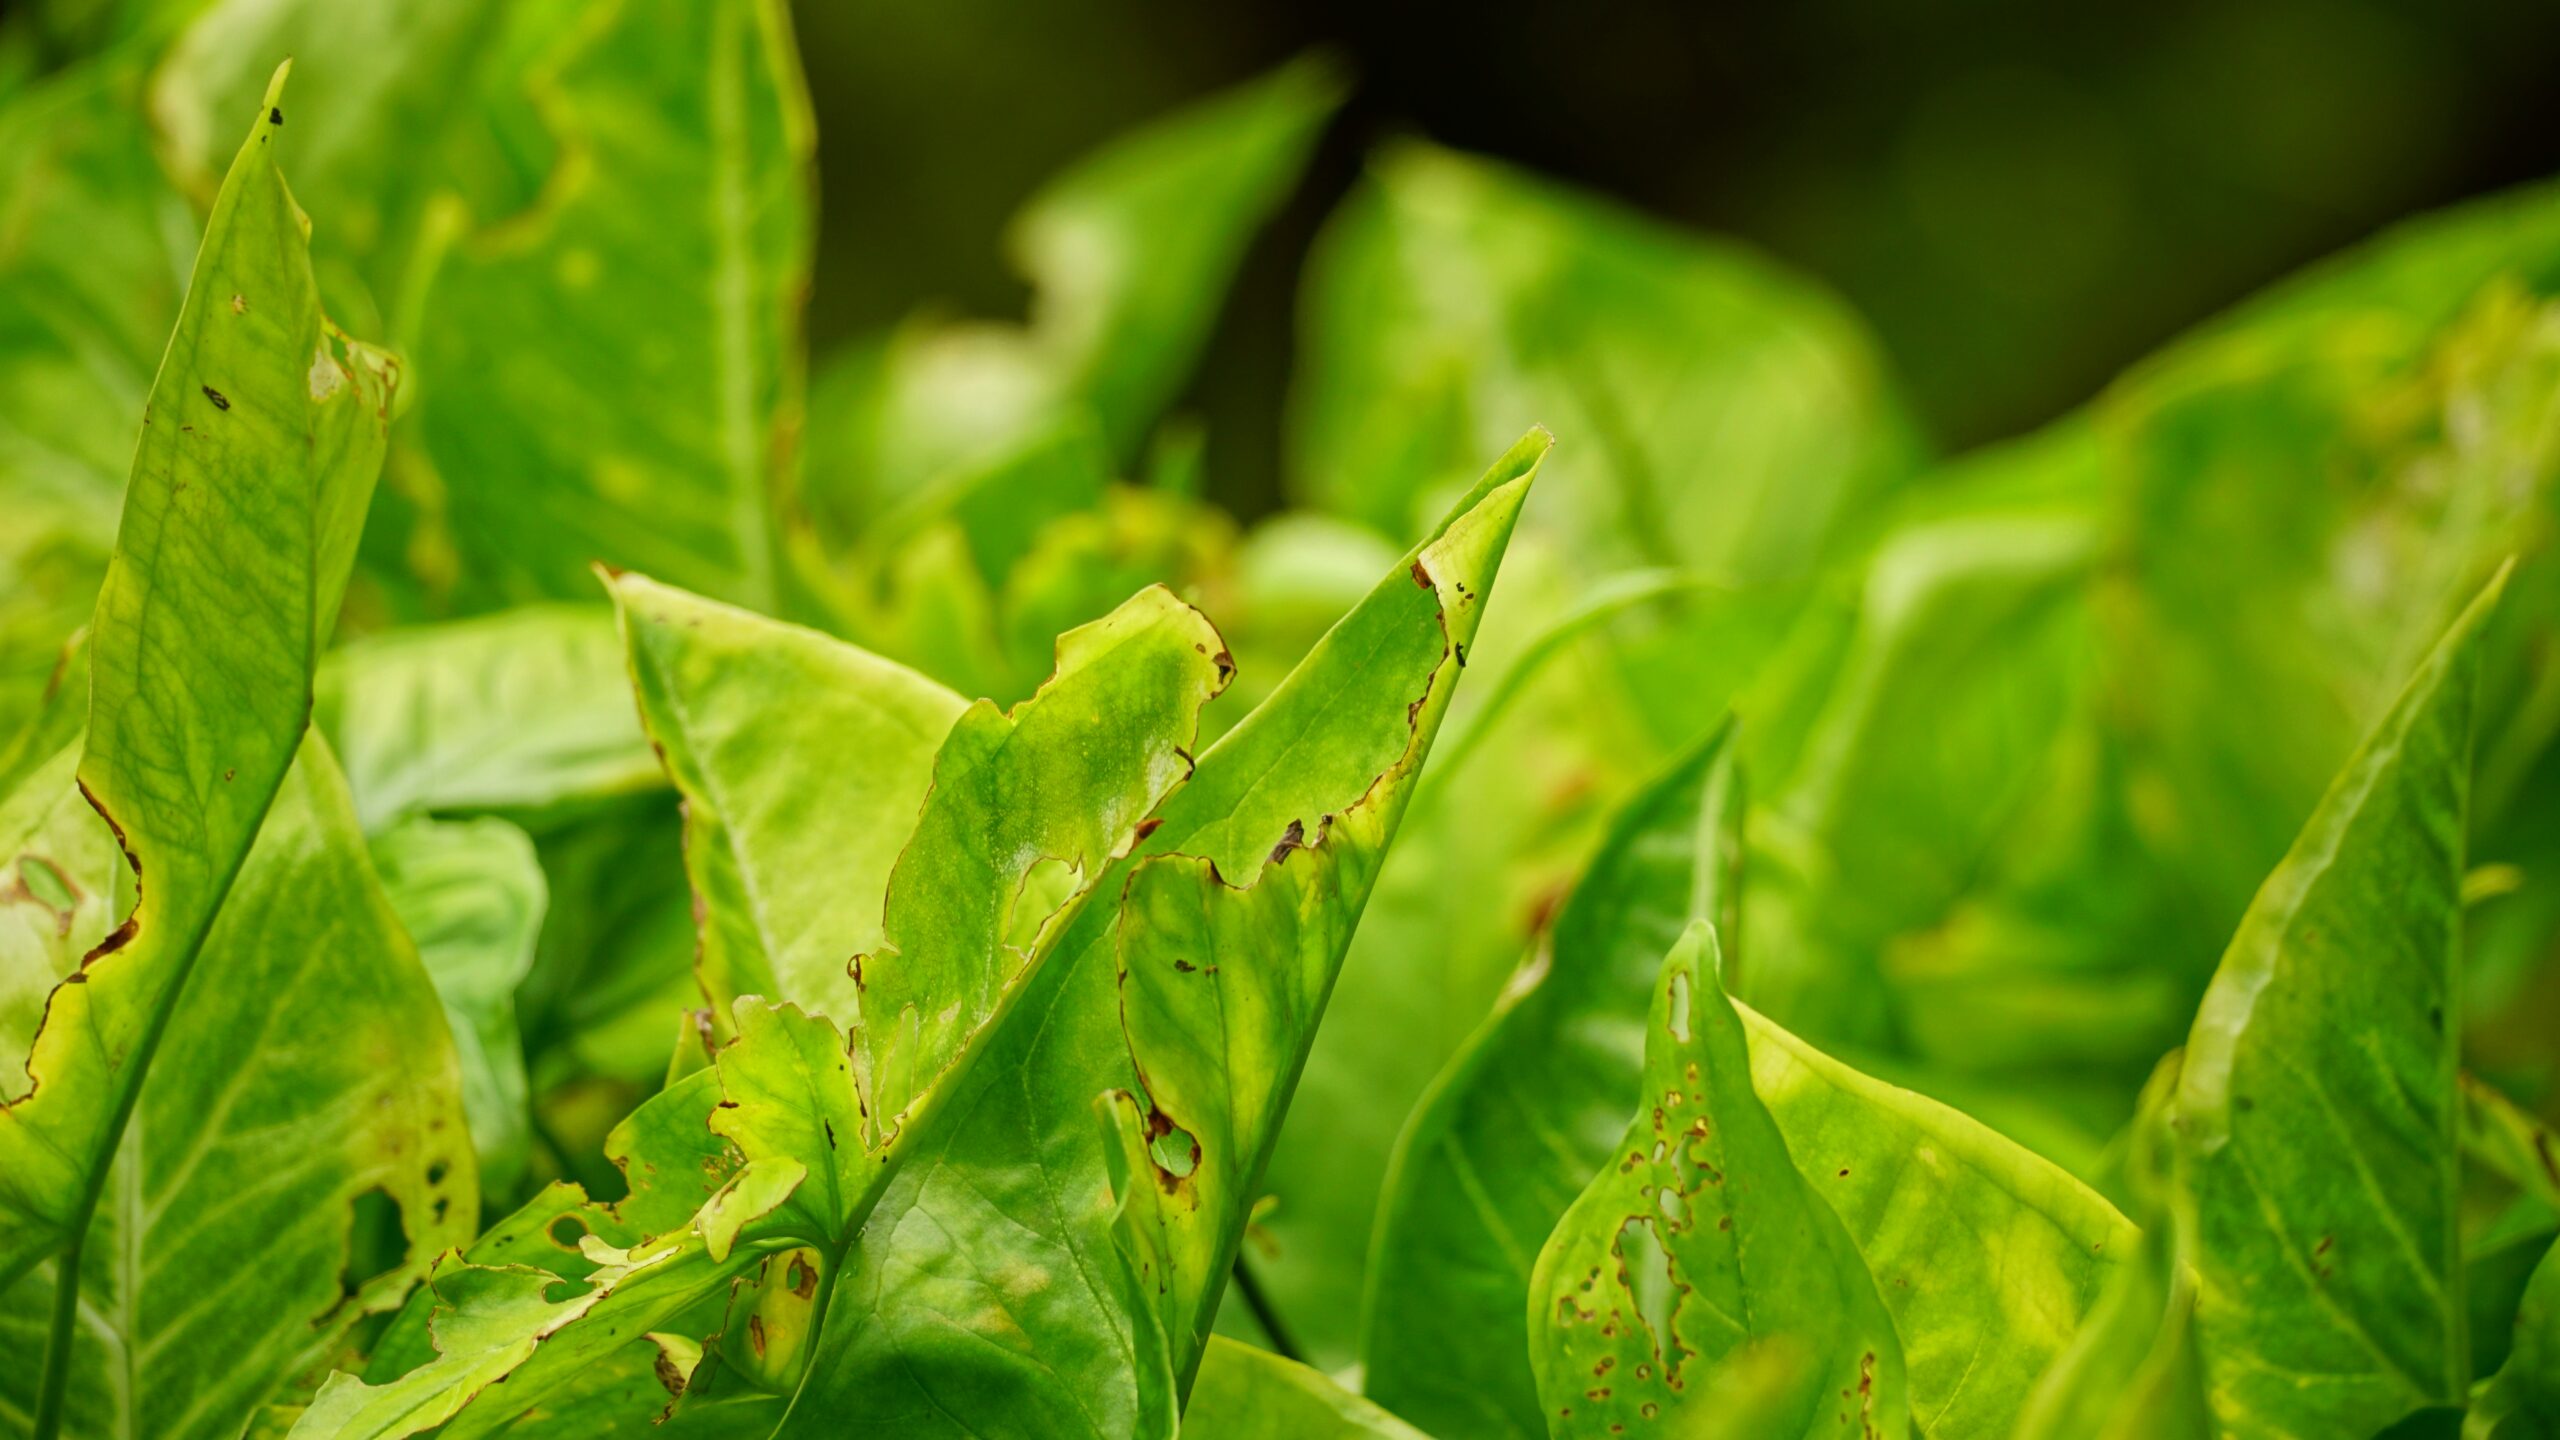
Interveinal chlorosis, a slowdown in the photosynthesis process

Resetting, distortion and chlorosis occurs in leaves, cause delay in flowering


Patches’ appearance on leaves, leaf deformation, and redness on the veins


Apical necrosis, over-thickness of leaves, and poor seed development


Its deficiency seriously affects carbon fixation in leguminous crops


Shortened roots, wilting, and bronzing of leaves


Increase in germination time of seeds, necrosis in leaf tips


Yellowing of leaves affects the nodulation in leguminous crops.


Affect the photosynthesis process of plants, causing various diseases in plants

Plant nutrients and their organic sources

To make compost at home it’s very important to know all organic sources of primary, secondary and micronutrients of the plants. Let’s have a brief overview of the natural sources of nutrients

1. Nitrogen (N)
2. Phosphorus
3. Potassium
4. Calcium
5. Magnesium
6. Sulfur
7. Iron
8. Zinc
9. Copper
10. Boron
11. Molybdenum
12. Chlorine​
13. Cobalt
14. Manganese

DIY method of compost formation at home

Step 1

Use a container with a specific space, according to the amount of compost. You can dig a pit of some depth in your field.

Step 2

Collect all above mentioned and available material from your home, cattle farm and field, and make two separate sections of brown and green material for layering.

Step 3

Start layering material in the container or pit, make a thin layer of brown material, cover the brown layer with a green one, then add nutrient scrap.

Step 4

 Sprinkle some water on the layer to balance the level of moisture in the material. Avoid overuse of water; it should be like a squeezed sponge.

Step 5

Add some amount of old compost as a starter dose. Repeat the process of layering. Avoid using large chunks of fruit, vegetables, and other residues.

Step 6

Keep the container in a dry and fresh area, pulverize the layer of your compost after the interval of three to four days for proper aeration.

Step 7

The compost will be ready after seven to eight weeks. Save the compost in a bag for later use.

Signs that compost is ready

After 7-8 weeks observe your compost. The following sign shows that the compost is ready to use

How to use compost in the kitchen garden?

Let’s discuss the usage of compost on different stages of planting in the kitchen garden

1. Application before sowing

Must apply the compost before sowing vegetables and herbs in your kitchen garden as the basal dose. Mix the top six inches of your soil with 2 inches of compost and pulverize it well. It will improve the nutrient level of the soil. Let the compost absorb into the soil for 5 to 6 days and then sow the herbs and vegetables and herbs.

2. Application during the growth of the plant

Observe your plants daily; if you notice any deficiency symptoms, then you have to apply compost to the soil. Mix the top layer of soil with one or one-half-inch layer of compost. Apply the compost near the root zone of your plants and till the soil well. This application will refresh the plants, leading to healthy growth.

Benefits of homemade compost

Here are some benefits of making compost by DIY methods at home

  • The best way to use landfill waste
  • Improve the nutrient level and texture of the soil
  • Reduces the consumption of expensive and toxic fertilizers
  • Enhance the water retaining capacity of soil

Conclusion

Health of soil plays an important role in the growth and development of herbs and vegetables. Instead of putting toxic fertilizers, maintain the nutrient level of  soil with nutrient-rich homemade compost. It’s a slow but cost-effective method to enhance the soil health in the kitchen garden.

Leave a Comment

Your email address will not be published. Required fields are marked *

Scroll to Top